Top Ad 728x90

Thursday, July 17, 2025

Put Raw Sliced Onions in a Slow Cooker with These 2 Ingredients

by


 Sometimes the most comforting dishes don’t require a dozen spices, hours of prep, or a trip to a specialty store. All it takes is a few humble ingredients and a little patience — and your slow cooker will do the rest.

One of the simplest slow cooker recipes with surprisingly rich flavor starts with something most of us already have on hand: raw sliced onions. Combine them with just two other basic ingredients, and you’ll create a dish so savory and satisfying, it tastes like it simmered in a French bistro — but it came from your kitchen.

Let’s unlock this delicious secret.


The Three-Ingredient Magic

Here’s all you need:

  • 3–4 large onions, thinly sliced (yellow or sweet onions work best)

  • 2 tablespoons of butter

  • 1 tablespoon of balsamic vinegar (or Worcestershire sauce for a deeper umami flavor)

That’s it. No stock. No salt. No sugar. Just these three ingredients — and time — to create caramelized, melt-in-your-mouth onions packed with flavor.


What Happens in the Slow Cooker?

When you put raw onions in a slow cooker with butter and balsamic vinegar, a quiet transformation begins.

Over several hours, the onions break down slowly. The natural sugars are released and caramelized gently by the heat and acidity of the vinegar. The butter adds richness and silkiness. The result is deeply golden, sweet-savory onions with a jam-like texture and an irresistible aroma.


How to Make It

Ingredients:

  • 3–4 large onions, peeled and thinly sliced

  • 2 tablespoons unsalted butter

  • 1 tablespoon balsamic vinegar or Worcestershire sauce

Directions:

How to Make It

Ingredients:

  • 3–4 large onions, peeled and thinly sliced

  • 2 tablespoons unsalted butter

  • 1 tablespoon balsamic vinegar or Worcestershire sauce

Directions:

  1. Layer the onions
    Place the sliced onions into the bottom of your slow cooker.

  2. Add butter and vinegar
    Dot the butter across the top of the onions. Drizzle the balsamic vinegar (or Worcestershire sauce) evenly.

  3. Set it and forget it
    Cook on low for 8–10 hours, or high for 4–5 hours, stirring once or twice if you're home. The onions should turn deep golden brown, soft, and fragrant.


What You Can Do with These Onions

Once done, these rich caramelized onions become a kitchen powerhouse. Here’s how you can use them:

  • Grilled cheese upgrade: Add a scoop to your sandwich for a gourmet twist.

  • Burger topping: Better than anything you’ll find at a diner.

  • Pizza or flatbread: Pile them on with goat cheese or sausage.

  • Steak or chicken topping: Adds instant flavor depth to simple proteins.

  • Soup base: Stir into broth for a quick, rustic onion soup.

  • Quiche or omelet filler: For an earthy, sweet-savory boost.

You can also store them in the fridge for up to a week or freeze them in small portions for future meals.


Why This Recipe Works

  • Minimal effort: Just slice, dump, and walk away.

  • Big payoff: Rich flavor from everyday ingredients.

  • Healthy comfort: No added sugar or preservatives — just real food.

  • Budget-friendly: Onions are inexpensive and filling.


Final Thoughts

With nothing but raw sliced onions, a little butter, and a splash of vinegar, you can transform basic pantry staples into a dish that feels elevated and cozy all at once. It’s a recipe that proves the best meals often start with the simplest ingredients — and a little slow-cooked patience.

Try it once, and you’ll never look at an onion the same way again

Baked Cauliflower Tastes Better Than Meat

by


 Cauliflower is one of the most underrated vegetables in the kitchen, yet when prepared the right way, it can be transformed into a crispy, flavorful, and satisfying dish that rivals even the best cuts of meat. My recipe for crispy roasted cauliflower proves just how versatile and delicious this humble vegetable can be. With a golden, crunchy exterior and a tender, flavorful inside, this dish is perfect as a snack, side, or even a main course. 


Let’s dive into the step-by-step process of making crispy roasted cauliflower that tastes better than meat! 

Ingredients 

To make this delicious crispy roasted cauliflower, you’ll need: 

• 1 medium cauliflower head (cut into bite-sized florets) 
• 3 tbsp olive oil (or melted butter for extra richness) 

• ½ cup breadcrumbs (panko for extra crispiness) 

• ½ cup grated Parmesan cheese (optional but recommended) 

• 1 tsp garlic powder 

• 1 tsp onion powder 

• 1 tsp smoked paprika (for a deep, smoky flavor) 

• ½ tsp chili flakes (optional for heat) 

• Salt and black pepper to taste 

• 1 tbsp cornstarch (helps create extra crispiness) 

• 1 egg (or plant-based alternative for a vegan version)

Step-by-Step Instructions 


Step 1: Prepare the Cauliflower 

Start by washing the cauliflower and cutting it into evenly sized florets. This ensures that all the pieces cook at the same rate. Pat them dry using a paper towel—removing excess moisture helps the florets crisp up in the oven. 

Step 2: Preheat the Oven 

Set your oven to 220°C (425°F). A high temperature is key to achieving a crispy texture without making the cauliflower soggy. 

Step 3: Coat the Cauliflower 

In a large bowl, whisk together the olive oil (or melted butter), garlic powder, onion powder, smoked paprika, chili flakes, salt, and pepper. Toss the cauliflower florets in this mixture, ensuring they are evenly coated. 

Step 4: Add the Crispy Coating 
In a separate bowl, mix the breadcrumbs, Parmesan cheese, and cornstarch. If you prefer a thicker coating, dip each cauliflower floret into a beaten egg before rolling it in the breadcrumb mixture. 

Step 5: Arrange on a Baking Sheet 

Line a baking sheet with parchment paper and spread the coated cauliflower evenly. Make sure the florets aren’t overcrowded—this allows them to crisp up rather than steam. 

Step 6: Roast to Perfection 

Place the baking sheet in the preheated oven and bake for 25-30 minutes, flipping the florets halfway through for even crispiness. They should turn golden brown and crunchy on the outside while remaining tender inside. 

Step 7: Serve and Enjoy 

Once out of the oven, let the cauliflower cool for a few minutes. Serve with your favorite dipping sauce—garlic aioli, spicy mayo, or a tangy yogurt dip all work wonderfully. 

Why Does This Taste Better Than Meat? 


• Crispy & Flavorful – The combination of a crunchy coating and roasted caramelized cauliflower creates a texture that’s hard to resist. 

• Healthier Alternative – Cauliflower is packed with fiber, vitamins, and antioxidants, making it a nutritious substitute for fried meats. 

• Umami Boost – Ingredients like Parmesan and smoked paprika add a deep, savory flavor, making this dish incredibly satisfying. 

• Versatile Dish – You can enjoy this as a snack, a side dish, or even as a filling for tacos or wraps! 

Final Thoughts 

This crispy roasted cauliflower recipe is a game-changer. It’s crunchy, flavorful, and incredibly satisfying—proving that vegetables can be just as delicious (if not better) than meat. Give this recipe a try and see for yourself! 

A Delightful Dessert for True Coffee Lovers

by


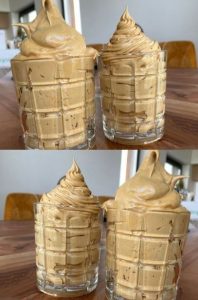
2-Minute Coffee Mousse: A Delightful Dessert for True Coffee Lovers

If you’re a coffee enthusiast who occasionally craves a sweet treat but doesn’t have the time or patience for elaborate desserts, this 2-minute coffee mousse is exactly what you need. It’s quick, simple, and perfectly complements your cup of coffee with a creamy, velvety texture and rich coffee flavor — all without the fuss of baking or complicated preparations.

This dessert is ideal for those moments when a sudden craving strikes, whether mid-afternoon or after dinner, and you want something indulgent but effortless. Plus, it’s incredibly versatile and can be customized to suit your personal taste and mood.

Ingredients (serves 1 generous portion):

  • 100 ml (1 dl) strong, cold black coffee — freshly brewed and cooled or iced coffee works best for a vibrant coffee flavor. Using cold coffee ensures the mousse sets nicely and retains its texture.

  • 1 tablespoon instant coffee powder — this boosts the coffee intensity and adds depth to the mousse. Feel free to adjust this amount depending on how strong you like your coffee taste.

  • 1 tablespoon sugar or sweetener — add to your liking; you can use white sugar, brown sugar, honey, maple syrup, or any alternative sweetener you prefer.

  • 2 tablespoons mascarpone cheese — this Italian cream cheese brings a rich, smooth, and slightly tangy flavor. If you prefer a lighter version, substitute mascarpone with thick Greek yogurt, which still provides creaminess but with fewer calories.

  • Cocoa powder for dusting (optional) — a light sprinkle adds a touch of elegance and a hint of chocolate aroma.

Step-by-Step Preparation (takes about 2 minutes):

  1. Prepare your coffee:
    If you don’t already have cold coffee ready, brew a strong cup of your favorite coffee and let it cool to room temperature or chill it briefly in the fridge. The coffee should not be hot or it will melt the mascarpone and change the texture of the mousse. For a refreshing summer twist, use iced coffee or add a few ice cubes to your cup before mixing.

  2. Combine the base ingredients:
    In a small bowl, cup, or mug, pour the cold black coffee. Add the instant coffee powder and sugar or sweetener. Stir gently but thoroughly until the instant coffee granules and sugar dissolve completely. This ensures a smooth base without gritty bits.

  3. Add the creamy element:
    Spoon in the mascarpone cheese or Greek yogurt. The mascarpone is key to achieving the luxurious, creamy mouthfeel that mimics a mousse without the need for eggs or heavy whipping.

  4. Whisk to fluff:
    Using a small whisk or a fork, beat the mixture vigorously. This step incorporates air and blends the mascarpone evenly throughout the coffee, creating a light, fluffy consistency. While it won’t be as airy as a traditional mousse made with whipped cream or egg whites, the result is a satisfyingly creamy dessert with a pleasant, mousse-like texture.

    1. Serve and garnish:
      Pour or spoon the mousse into a small serving glass or bowl. For an added touch of flavor and presentation, dust the top with cocoa powder. You can also garnish with chocolate shavings, a few whole coffee beans, or a sprinkle of cinnamon if you like.

    Tips and Flavor Variations to Elevate Your Coffee Mousse

    • Amp up the coffee: For those who adore a powerful coffee kick, simply increase the instant coffee powder to 2 tablespoons. This will deepen the coffee aroma and intensity, making it more robust and energizing.

    • Chocolate lovers rejoice: Mix in a teaspoon of unsweetened cocoa powder or melted dark chocolate into the coffee mixture before adding mascarpone for a luscious mocha flavor. You can also dust cocoa powder or grated chocolate on top for extra decadence.

    • Adult twist: Add a splash of coffee-flavored liqueur like Kahlúa, Tia Maria, or your favorite coffee-infused spirit. This gives the mousse a rich complexity and warmth — perfect for an after-dinner treat.

    • Whipped cream indulgence: Top your mousse with a dollop of whipped cream for a creamy, airy finish. This step takes only seconds but dramatically boosts the dessert’s indulgence factor.

    • Play with flavors: Vanilla extract, almond essence, or even a pinch of cinnamon or nutmeg can add an interesting twist to the mousse. A little goes a long way, so start with a drop or pinch and adjust to taste.

    • Iced coffee version: Perfect for warm weather, prepare the mousse with iced coffee or coffee chilled with ice cubes. Keep in mind the mousse will be less firm and more fluid but equally refreshing.

    Why This Coffee Mousse Is Perfect When Time Is Tight

    Unlike traditional mousse recipes that require whipping egg whites or heavy cream and chilling for hours, this quick coffee mousse skips all the hassle. It relies on the creamy mascarpone (or Greek yogurt) and instant coffee powder to create a rich texture and bold flavor with minimal effort.

    This recipe is excellent for busy mornings, spontaneous coffee breaks, or when unexpected guests drop by and you want to serve a stylish, homemade dessert without breaking a sweat. It’s also a fantastic way to use up leftover coffee or quickly satisfy your sweet tooth.

    Final Thoughts

    Whether you’re a hardcore coffee lover looking for a new way to enjoy your favorite drink or just someone who appreciates simple yet delicious desserts, this 2-minute coffee mousse recipe is a winner. It combines the deep, comforting flavors of coffee with the creamy indulgence of mascarpone, creating a luscious treat you can make anytime.

    Give it a try today and turn your coffee break into a mini celebration!

Wednesday, July 16, 2025

Made this tonight and my wife and I ate almost

by


 These Taco Stuffed Shells are a fun and flavorful twist on traditional stuffed pasta. Jumbo shells are filled with seasoned ground beef, refried beans, and cheese, then baked in a salsa-rich sauce. It’s a comforting and satisfying meal that’s perfect for family dinners.

Ingredients:
Ingredient Quantity
Jumbo pasta shells 8
Ground beef ½ pound
Taco seasoning mix ½ (1.25 ounce) package
Water ½ cup
Refried beans ½ (16 ounce) can
Shredded Cheddar cheese ⅓ cup + 2 tablespoons
Salsa ½ (16 ounce) jar, divided
Green onion (sliced) 2 tablespoons
Sour cream ¼ cup
Instructions:
Preheat oven: Preheat the oven to 350 degrees F (175 degrees C).
Cook the pasta: Bring a large pot of water to a boil over high heat. Stir in the jumbo pasta shells and return to a boil. Cook the pasta uncovered until just slightly firm to the bite, about 13 minutes. Drain well.
Brown the beef: Brown the ground beef in a large skillet; drain any excess fat.
Season the beef: Stir in the taco seasoning mix and water. Cook over low heat until thickened, about 5 minutes.
Add beans and cheese: Stir the refried beans and ⅓ cup of shredded Cheddar cheese into the taco meat mixture.
Stuff the shells: Spoon the meat mixture into the cooked pasta shells.
Prepare the baking dish: Spoon ¼ cup of salsa over the bottom of a 9×13 inch baking dish.
Arrange the shells: Arrange the filled pasta shells over the salsa in the baking dish.
Top with salsa: Spoon the remaining salsa over the stuffed shells.
Bake: Bake in the preheated oven for 40 minutes.
Garnish: Remove from the oven and sprinkle with sliced green onion and the remaining 2 tablespoons of shredded Cheddar cheese.
Serve: Serve with sour cream. Enjoy!

Never Knew Applesauce Could Make Bread

by


 There's something deeply comforting about the scent of cinnamon, nutmeg, and apples filling your kitchen as the seasons change.


But what if we told you that your next loaf of homemade bread could be even better than banana bread — and just as easy?

Enter: applesauce bread — a moist, spiced treat that tastes like autumn in every bite. 

This simple yet rich quick bread uses pantry staples — and one surprising ingredient that keeps it soft, flavorful, and perfectly tender: applesauce .

Let’s dive into why this bread works so well — and how you can make it at home with minimal effort and maximum reward.

🍎 Why Applesauce Makes the Best Bread
Applesauce isn’t just a childhood snack — it’s a baker’s secret weapon.

Here’s What It Does:
Adds natural moisture without making the bread soggy
Enhances flavor with subtle sweetness and apple spice
Reduces the need for extra oil or butter
Keeps bread soft and fresh longer
Because applesauce already contains water and natural sugars, it gently sweetens the loaf while keeping it light and fluffy.

It’s also a great way to cut back on fat — without sacrificing texture.

🥣 Ingredients for the Ultimate Applesauce Bread
1½ cups flour
The base for structure
1 cup applesauce (unsweetened or sweetened, based on taste)
Adds moisture and mild fruitiness
¾ cup sugar
Sweetness balance — adjust to taste
½ cup oil
Keeps the crumb tender and soft
2 eggs
Binds everything together and adds richness
1 tsp baking soda
Leavening agent for rise
½ tsp baking powder
Extra lift and soft texture
1 tsp cinnamon
Autumn flavor essential
¼ tsp nutmeg & cloves
Deepens the warm spice profile

✅ Optional add-ins: Chopped walnuts, raisins, or grated apple for extra texture.

🍞 Step-by-Step: How to Bake This Fall Favorite
Step 1: Preheat
Preheat your oven to 350°F (175°C) . Grease and flour a standard loaf pan — or line it with parchment paper.

Step 2: Mix Wet Ingredients
In a large bowl, whisk together:

Oil
Eggs
Applesauce
Sugar
Mix until smooth and slightly frothy.

Step 3: Add Dry Ingredients
In another bowl, combine:

Flour
Baking soda
Baking powder
Cinnamon
Nutmeg
Cloves
Gradually fold the dry mix into the wet ingredients. Stir just until combined — don’t overmix!

Step 4: Pour and Bake
Pour the batter into your prepared loaf pan. Smooth the top and bake for 50–60 minutes , or until a toothpick comes out clean.

Let cool for 10–15 minutes in the pan , then transfer to a wire rack.

Pro tip: Wrap the cooled bread in foil and let it sit overnight — it gets even more flavorful by morning.

🧁 Optional Topping Ideas That Take It Over the Top
Cinnamon-sugar glaze
Mix powdered sugar + cinnamon for a quick dusted finish
Cream cheese spread
A dollop of whipped cream cheese elevates each slice
Maple drizzle
Drizzle pure maple syrup before serving
Apple butter swirl
Swirl a few spoonfuls into the batter for deeper apple flavor
Streusel topping
Crumble made from oats, brown sugar, cinnamon, and butter gives a bakery-style touch

You can even turn this into muffins by baking them at the same temperature for 20–25 minutes instead of one big loaf.

🍽️ Why You’ll Love This Bread
It’s easy to make — no mixer needed
It’s perfect for meal prep — lasts up to 4 days at room temperature
It makes your house smell like fall, comfort, and baked memories
It’s great for sharing — or freezing for later cravings
And best of all?

It uses ingredients you probably already have
It's kid-friendly and crowd-pleasing
It's a healthier alternative to oil-heavy cakes
📌 Final Thoughts: Sometimes the Best Recipes Are the Simplest Ones
We often think fall desserts need caramel, pumpkin spice lattes, or layers of frosting to feel special.

But sometimes, all it takes is a warm kitchen, a loaf pan, and a jar of applesauce to bring the season to life.

So next time you're craving something sweet, soft, and spiced with autumn…

Don’t reach for the pumpkin.

Reach for the applesauce.

Because the best breads aren’t always complicated — they’re the ones that make your heart feel full with every bite.

Top Ad 728x90